






Browse our handpicked selection of vehicles that currently carry a very favorable book value in relation to where they are priced.
If you are looking for a vehicle that could help relieve some negative equity pain in your current vehicle, these selections could help get you on your way.
Maybe you just want to make a great buy and purchase a vehicle priced well under current book value. Taylor's AutoMax is here to help! Click here!
Sincerely,
Your Taylor's Auto Max Team
Posted in:

How to Get Your Vehicle Ready for a Road Trip
Memorial Day weekend is almost here, and camping season has officially begun. After months of being cooped up in our homes, now is the perfect time to jump in the car and go on a road trip you'll never forget. But to make sure it all goes off without a hitch, take a look at our checklist so you're fully prepared for everything your adventure brings. 1. Check Tires and Tire Pressure Inspect all four tires and, if you have one, the spare tire as well. Look for cuts, gouges or sidewall bulges. Insert a penny upside down into grooves to check tire tread. If you see the top of Abraham Lincoln’s head, it is time for new tires. Check tire pressure when the car has been idle and tires are cool. Inflate as needed to the vehicle manufacturer’s recommended pressure. You will find it listed in the owner’s manual and on the sticker of the driver side door jamb. Do not use the number on the tire sidewall. 2. Test and Listen to Your Brakes If you hear a grinding sound or feel a vibration when applying the brakes, take your vehicle to an auto repair shop for a brake inspection. A service professional will check the brake system for fluid leaks, and the pads, rotors, shoes and drums. If repair or replacement is needed, you can schedule an appointment with Taylor's Auto Max's Service Department here. 3. Check the Battery Check your car's battery to be sure the connection is tight and corrosion-free. If there is corrosion, you'll need to disconnect the battery and clean the connectors with a wire brush. Batteries contain corrosive acid that may leak if battery connectors are forced off, so if you're not familiar with how to check and clean a car battery, it may be best to leave it to a professional. As a general rule of thumb, you should have your vehicle's battery checked annually after it's more than two years old. 4. Top Off Engine Oil and Other Fluids Check the levels of your car's many fluids, including engine oil, power steering and transmission fluids and windshield washer fluid. If any of them are low, top them off before hitting the road. If your car is close to needing its next oil change, it may be worth having it done before your trip. You should also check your vehicle's engine coolant (also known as antifreeze) tank to confirm it's filled to the car manufacturer's recommended level. However, keep in mind that even if it's filled to the proper level, you may still need to have the coolant changed out if there are floating particles in it or if the fluid is clear. Coolant can also become acidic over time, so you may want to have your coolant tank checked for any corrosion. This could cause damage to other parts of the vehicle, such as the radiator or hoses. 5. Check Belts and Hoses Engine belts and hoses are critical when it comes to keeping your car's electrical, power steering and cooling systems functioning properly. Have them inspected to determine if any are frayed or cracked. Belts should also be tightly installed, so be sure to verify that they're secure and don't have a large amount of slack. Lastly, be sure to have your hoses checked for any leaks or drips. Don't forget to check your owner's manual for recommended belt and hose service intervals, as some cars may require replacements in as little as 60,000 miles. 6. Check Air Filters Most vehicles have two types of air filters. The engine air filter provides debris-free air to the engine, and the cabin air filter filters the incoming air to the passenger compartment. For the vehicle to perform as intended and for the people inside it to breathe freely, the vehicle’s air filters need to be replaced regularly. The engine air filter and cabin filters should be replaced according to the manufacturer’s specifications. Barring that, every 10,000 to 15,000 miles is a good rule of thumb. 7. Replace Wiper Blades and Replenish Windshield Cleaner Rubber wiper blades naturally deteriorate over time. If wipers streak or fail to clear the windshield thoroughly, replace the blades. Fill the windshield washer reservoir with fluid formulated to remove insects and other debris, and test to make sure the nozzles spray adequately. 8. Verify Lights and Electrical Equipment are Working A vehicle’s headlights are an obvious source of light, but there are multiple bulbs inside the cabin that may occasionally need checking and replacement. There is nothing more irritating than trying to use an interior light after dark, only to find out that it has burned out. These are generally easy to replace, and most auto parts stores carry a wide variety of replacements saving you trip to the dealer. 9. Test the Air Conditioner Take a test drive with the air conditioner running. If you notice a decrease in cooling capacity, take the car to an auto repair shop for diagnosis. Also have the cabin filter inspected and replaced as needed. 10. Clean and Replenish Emergency Supplies Driving a clean vehicle doesn’t just make for a more pleasant experience behind the wheel; it can add up to a fuel economy penalty if there is enough added weight. In addition to a full vacuum and exterior wash, make sure to remove all the excess baggage—athletic equipment, laundry and the rest of the daily detritus—to remove any extra weight. As a side bonus, it will clear room for luggage and other items required for the road trip. Plus, the psychological benefits of hitting the road in a clean, well-organized machine will make the trip even better. It's also recommended that you keep a well-stocked emergency kit in your vehicle. Include a flashlight and extra fresh batteries, first-aid supplies, drinking water, non-perishable snacks for people and pets, car battery booster cables, emergency flares or reflectors, a rain poncho, a basic tool kit, duct tape, gloves and shop rags or paper towels.
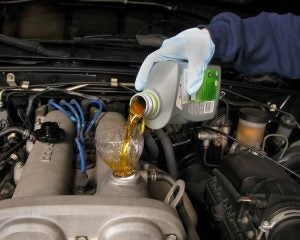
5 Car Fluids You Can't Afford to Forget
Heat and friction from your car's moving parts require lubrication, and without it, your car just can't function properly. Most drivers know all about the lifeblood of every automobile's engine — oil, but what other fluids does your car use? Don't hit the road without an occasional once-over of your car's vital fluids. Discover these five fluids you can't afford to forget in your vehicle and satisfy your car's thirst with these easy tips. Transmission Fluid It's important to check your car's transmission fluid regularly to prevent damage to your car's powertrain. Just like oil lubricates your engine's pistons, transmission fluid lubricates your car's gears. It also provides the hydraulic pressure needed to operate your gearbox. Check your fluid monthly and replace it every 50,000 miles or as often as noted in your owner's manual. Transmission fluid works within a closed system and should never "run out." If you notice a depletion in your transmission fluid levels, get your car to the dealer's service center right away. Brake Fluid No one needs to explain the importance of fast braking, therefore checking your brake fluid should be a top priority. Similar to the way your transmission uses hydraulic pressure to shift gears, your brakes use fluid to apply pressure to your brake's calipers. Also like transmission fluid, brakes operate in a closed system and should never be low on fluid. Check your brake fluid levels every time you check your engine oil, or about once a month, and anytime you notice a change in the way your brake pedal feels. Radiator Coolant With the help of your radiator, coolant or antifreeze helps protect your car from overheating, either by engine heat or high ambient temperatures. Coolant also acts as an "antifreeze" to prevent your engine block from freezing during the winter. Check your coolant levels every six months, in the spring and fall before significant seasonal temperature changes. Flush your radiator and completely replace coolant every two years, or as directed by your service technician. Power Steering Fluid Power steering fluid was a phenomenal invention in 1951 that revolutionized the automotive industry. On today's modern vehicle, without power steering fluid, it would be nearly impossible to control your car. Don't risk a collision; check your car's power steering fluid once a month or more often if you hear squeaking noises or the steering wheel is difficult to move when you make a turn. Windshield Washer Fluid While windshield washer fluid might seem trivial compared to obvious essentials like brake fluid, it's a crucial part of your car's safety components. Rain and even mist can attract dirt which sticks to your glass and limits visibility. Without washer fluid to clear away the grime, you could be in a situation where you're driving blind. This handy fluid checklist will make sure you're keeping up with your car's maintenance needs, and if any of these essential systems were to dry-up, repair costs could get pretty high. When in doubt, visit your dealership's service center and schedule an appointment to have all your fluids checked. You'll be glad you did. "step 5" by Robert Couse-Baker, licensed via CC BY 2.0
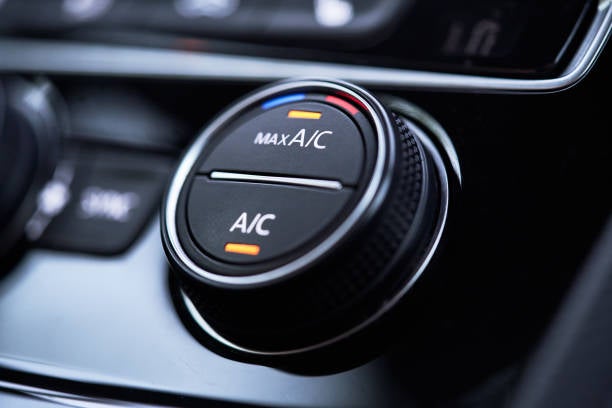
A Guide for Common Car AC Issues
Air conditioning is one of those things that’s easy to take for granted — until you don’t have it. When it’s the middle of summer and the temperature outside is rising, the last thing you want is to be stuck in a car that’s blowing hot air out of the vents … or in a car with an air conditioner that's not blowing at all. Being in a car without air conditioning in hot weather isn’t just annoying; it can also be dangerous, since cars heat up quickly. This puts you at risk for dehydration and even heat stroke. It’s even more dangerous for children, the elderly and people with compromised health, so making sure your air conditioning is in good working condition is definitely something you want to make a priority this summer. That means if you’re hitting the road this summer, you’ll probably want to have your mechanic give it a quick checkup before you go. Visit the Taylor's Auto Max online scheduling tool to make an appointment to have your vehicle's air conditioning system inspected before the summer heat begins. Diagnosing the Problem Like most things under the hood, air conditioners can stop working for a number of different reasons. Knowing what to look for can help you troubleshoot why your car A/C is not working and let you know what steps you need to take next. Let’s look at the most common reasons your car A/C might have stopped working. Begin with Testing How your AC Feels If the air conditioning is set to max cool and fans on high, but is only blowing moderately cool air: Check to see that the cooling fans on the condenser or radiator are running when the air conditioning is on. Look for any restrictions like leaves, bugs or dirt that would keep air from passing over the condenser. Check the cabin air filter to ensure that it is not clogged. Beyond this, the next step is to always check the pressures in the system using a manifold gauge set. The recommended high-side and low-side pressures can be found in your vehicle's repair manual, or online. Once you have your gauges hooked up, move on to observing the AC compressor itself. Refrigerant Leak This is one of the most common causes of car A/Cs not working. Leaks can originate from a number of different places; it could be the result of rubber seals and hoses breaking down over time, and that allows the refrigerant, Freon, to escape. The bigger danger when this happens goes beyond not having cool air in your car, but those weak spots can also allow moisture to get inside your car’s cooling system and mix with the refrigerant. When moisture and Freon mix together, they create a dangerous acidic combination that can harm you and your passengers, and will corrode your A/C system and cause permanent damage. As with any type of leak, you want to get this fixed quickly so it doesn’t continue causing problems for your car. Broken Cooling Fans Just like you need blowers to push the air conditioning through the vents in your home, your car uses cooling fans to move the refrigerated air into your vehicle’s cabin. When there’s a problem with the fans, you won’t feel any air coming out of the vents. Cooling fans can stop working properly for a number of different reasons; they might have blown fuses, an electrical short, or could have been cracked by debris from the road. Fortunately, this is fairly simple to fix; your mechanic should be able to replace it quickly and get you back on the road. A Problem with the Compressor Your air conditioning relies on a compressor to keep the air moving, but if the compressor isn’t working properly, that refrigerant isn’t going to move around. One of the main reasons a compressor goes bad is from not being used for long periods of time, and the long cool seasons of fall and winter means that many Montanans don’t run their air conditioning for several months. A compressor can also have problems if the clutch on the compressor gets stuck. If it gets stuck in the “on” position it will make your air conditioning run continuously, and if it’s stuck in the “off” position it will keep the compressor from engaging. You’ll need to have your mechanic look at what is causing the problem with your compressor. With the engine running, turn the A/C on max cool, set fans high, and make sure that the clutch is engaging on the compressor. Note: this is not the pulley, but the center piece that engages the pulley to the compressor shaft. If the clutch is engaging and disengaging once every few seconds, this is a sign of low refrigerant. You will also see the low-side pressure on your gauge drop rapidly when the clutch engages, hit a point of too-low pressure, then disengage and the pressure will rise. As you add more refrigerant, the gauge will hold steady, with the compressor running, and should hold at the recommended pressure. If the clutch is not engaging and the system has refrigerant, use a voltmeter to check for voltage getting to the compressor. If there is voltage - the clutch may be bad. If there is no voltage - a cycling switch may be bad, a fuse may be blown, and the system may not have enough refrigerant pressure to trip the low pressure cutoff switch that cycles the compressor. An Issue with the Condenser The condenser plays an important role; it takes the humid air in the air compressor and depressurizes, cools and liquefies that air. In simpler terms, it helps turn the air cool. When your air conditioning isn’t cooling as much, it could be a sign of a failing condenser. Electrical Problems There are several things that can cause electrical problems for your car’s air conditioning. These can include failed switches, a blown fuse, a problem with the control module or something else. Fuses can short out and make the A/C stop working or a loose connection can create an electrical short that is easily fixed. While electrical issues in the air conditioning system are often easy to fix, they need to be addressed immediately, since they can cause acid buildup. Acid buildup can cause serious damage to your vehicle and can even lead to needing to replace the entire air conditioning system. Staying on top of problems will keep this from happening. Other Leaks Leaks are one of the most common problems associated with the air conditioning system. If pressure is low, then there may be a leak. Using a UV A/C leak detection kit is the easiest way to find a leak. Follow the instructions on the packaging to introduce UV dye to the system and UV light to find the leak. Check around all fittings to verify that they are all secure. Check hose manifolds on the compressor. Check the front seal and the o-rings sealing the pressure switches on the back of some compressors. Check where the hoses are crimped onto the fittings. Check the Schrader Valves. Check for pin holes in the condenser. Check where the evaporator drains condensation with UV light. Sometimes oil or dye can be seen. Note: The dye check will not work if the system is too low and the compressor is not cycling. Still not sure? Check these Components AC Compressor and Clutch As mentioned before, the AC compressor is a rotating pump that circulates refrigerant (Freon) throughout the system. Common Problems: Leaks in one or more seals or the compressor itself can occur. Particle contamination from worn parts inside the compressor are a frequent culprit. The engagement clutch, called an AC clutch, can also fail rendering the compressor inoperative. What to Look For: If the refrigerant is low, check for visible system leaks that appear green and oily. Failing internal components caused by normal wear or low AC Oil levels caused by leaks. Failed AC clutch. Failed power supply to the AC clutch caused by a blown fuse, bad pressure control switch, dash control module or a broken circuit wire. Inspect and test before replacing! AC Accumulator / Drier The Accumulator/Drier collects and absorbs moisture. Moisture is like poison to the internal system components and can damage the AC Compressor as well. Depending on your vehicle, you may have an accumulator or a receiver/drier. Common Problems: Internal failure allowing desiccant material to enter the AC system. Like sugar in the gas tank, this stuff in the wrong places can cause major problems. Leaks can result in over-saturation of the desiccant material that can lead to compressor damage. AC Orifice Tube / Expansion Valve The AC orifice tube / expansion device filters and regulates the flow of refrigerant through your air conditioning system. Depending on your vehicle, you may have an orifice tube or an expansion valve. Common Problems: Contamination is the main cause of failure. If the system pressures are too high and/or too low, the expansion device could possibly be the issue. But first, ensure the refrigerant levels are correct and the radiator/A/C Condenser fan(s) are working properly. Remember, inspect and test before replacing! AC Evaporator Core The AC evaporator acts like a huge ice cube with holes in it. It allows the hot, cabin air to flow through the core, rapidly cools this air, and blows it out into the cabin again. The cool air felt from the dash vents is provided by the AC heater blower motor assembly. Common Problems: The number one cause of failure is a leak due to age and wear. An electronic leak detector is the best way to check for leaks. Give attention to the AC evaporator box water drain tube. Use the tester to search for a leak. A green and oily substance may appear in the drain tube if larger leaks are present. AC Condenser The AC condenser looks similar to a radiator and works in conjunction with the radiator fan(s). Air flowing across the AC condenser tubes cool the hot (gaseous) refrigerant that absorbed heat from inside the vehicle. This returns the refrigerant back to a liquid state where it will once again enter the evaporator core and absorb more heat from the interior. Common Problems: Refrigerant leaks. Contaminant particles from the AC Compressor or AC Accumulator/Drier restricting the flow of refrigerant can lead to poor cooling. While checking the AC Condenser, inspect the Radiator / AC cooling fan motor(s).